Thinking about giving your fence a fresh coat of paint? Before you start painting, it’s crucial to clean your fence thoroughly for the best results.
We will explain why cleaning your fence before painting is important, provide a list of tools you will need, and offer a step-by-step guide on how to clean your fence effectively.
Stay tuned for some useful tips to simplify the process and achieve a beautiful finish for your fence.

Why Clean Your Fence Before Painting?
Cleaning your fence before painting is essential to ensure that the paint adheres properly to the surface, providing a longer-lasting finish. Removing dirt, grime, and old paint layers through cleaning prepares the wood for a fresh coat of paint, enhancing the overall appearance and durability of the fence.
Painting over a dirty or rough surface can lead to poor paint adhesion, causing the paint to peel or chip prematurely.
By cleaning your fence thoroughly before painting, you create a smooth and clean canvas for the new paint to bond to, resulting in a more professional and polished look.
A clean surface ensures that the paint colour appears more vibrant and true to its shade, enhancing the aesthetic appeal of your property.
Uncover more: What Is The Best Type Of Wood To Use For Fencing

What Tools Do You Need To Clean Your Fence?
To clean your fence effectively, you will need several tools including a power washer, scrub brush, garden hose, bucket, and cleaning solution. These tools are essential for removing dirt, debris, and any old paint layers from the fence surface, ensuring a clean and smooth base for the painting process.
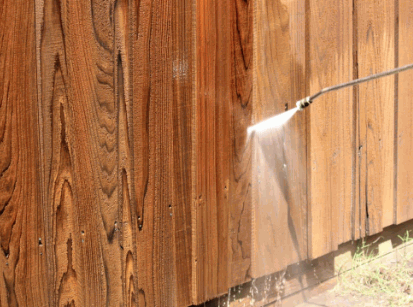
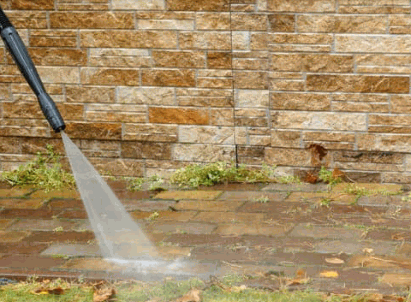
A power washer is great for blasting away tough grime and peeling paint. Its high-pressure water stream helps to deeply cleanse the fence surface, preparing it for a fresh coat of paint.
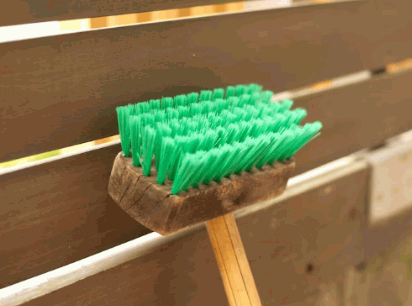
The scrub brush is ideal for scrubbing away stubborn stains and dirt buildup that the power washer might miss. It allows you to target specific areas that need extra attention, ensuring thorough cleaning.
Using a garden hose in conjunction with the power washer and scrub brush helps to rinse off any remaining residue and soap from the cleaning process.
A bucket is handy for mixing and carrying the cleaning solution, which is vital for breaking down grime and dirt, making it easier to remove. By having all these tools on hand, you can achieve a pristine surface ready for painting.
Power Washer
A power washer is a versatile tool that can help in deep cleaning your fence by using high-pressure water to remove dirt, mildew, and old paint. Before using a power washer, ensure you read and follow the manufacturer’s instructions to avoid damaging the wood surface.
Using a power washer on your fence can significantly reduce cleaning time compared to traditional methods. The high-pressure water stream effectively blasts away tough stains, grime, and even stubborn debris that may have accumulated over time. This not only restores the appearance of your fence but also helps in maintaining its structural integrity.
A power washer is environmentally friendly as it typically requires less water than manual cleaning methods while delivering superior results. It’s a cost-effective solution that can save you time and effort in fence maintenance.

Garden Hose
A garden hose is essential for rinsing off the cleaning solution and dirt from the fence surface after scrubbing. It provides a controlled stream of water for thorough cleaning, helping to prepare the fence for the next steps in the painting process.
When using a garden hose, ensure it has adequate water pressure to effectively rinse off any remaining debris and cleaning agents. Properly adjusting the nozzle to the desired stream intensity can assist in reaching all areas of the fence efficiently.
It is also important to start rinsing from the top of the fence and work downwards to ensure a systematic approach, avoiding streaks or potential damage to the newly cleaned areas.

Bucket
A bucket is useful for preparing cleaning solutions and transporting water to the cleaning site. It allows for easy mixing of detergents or cleaning agents, providing a convenient way to carry and apply solutions during the fence cleaning process.
When choosing a bucket for cleaning purposes, opt for one with a sturdy handle and a capacity that suits the amount of solution needed. Look for a bucket with measurement markings to ensure accurate dilution ratios. Consider a bucket with a spout for easy pouring and minimising spillage.
To maintain a clean workspace, dedicate one bucket specifically for clean water and another for dirty water or cleaning solutions. This organization helps prevent cross-contamination and ensures efficient cleaning. Ensure the buckets are cleaned and dried properly after each use to avoid the growth of mold or bacteria.

Cleaning Solution
A suitable cleaning solution is crucial for effectively cleaning a fence, especially for removing dirt, mildew, and grime. Opt for solutions that are safe for the environment and compatible with the fence material, such as acrylic-based cleaners, to ensure a thorough cleaning process.
Acrylic-based cleaners are known for their gentle yet effective cleaning properties, making them suitable for various fence materials. These solutions help to break down tough stains and grime without causing damage to the fence surface.
When selecting a cleaning solution, consider the specific needs of your fence. For wooden fences, opt for solutions that are gentle on wood but tough on dirt. Vinyl fences, on the other hand, may require a cleaner with UV protection to prevent fading and discoloration.
Plus the cleaning effectiveness, the right solution can also prepare the fence surface for painting or staining. Some cleaners contain components that help to prime the surface and ensure better adhesion for subsequent treatments.

How To Clean Your Fence Before Painting?
Cleaning your fence before painting involves several steps to ensure a thorough and effective cleaning process. By following the right instructions and using the appropriate tools and solutions, you can prepare the fence surface adequately for a fresh coat of paint, enhancing its appearance and longevity.
Begin by inspecting the fence for any loose debris or dirt that needs to be removed before cleaning. Use a broom or brush to sweep away these surface impurities. Next, power washes the fence to eliminate deeper-seated grime and stains. Choose an appropriate cleaner based on the type of material your fence is made of, be it wood, vinyl, or metal.
- Prepare your cleaning solution as per the manufacturer’s instructions,
- Apply it evenly over the entire surface of the fence,
- Be sure to wear protective gear like gloves and goggles,
Scrub the fence using a stiff brush or sponge, focusing on stubborn areas. Rinse thoroughly with clean water from top to bottom, ensuring all soap residue is removed. Allow the fence to air dry completely before moving on to the painting stage.
Prepare The Area
Before cleaning the fence, prepare the surrounding area by removing any obstacles and protecting nearby plants or structures. Ensure a clear workspace for cleaning, sanding, and applying cleaning solutions to the fence surface, allowing for a smooth and efficient cleaning process.
One crucial aspect to consider is protecting nearby plants from any potential harm during the cleaning process. You can use plastic sheeting or tarps to cover delicate foliage and prevent cleaning solutions from reaching them.
It’s essential to sand rough areas on the fence before applying any cleaning agents. This not only helps in achieving a smoother finish but also ensures better adhesion of protective coatings.
Layering protective materials like sealants or stains after the cleaning process can enhance the fence’s durability against harsh weather conditions and UV rays, extending its lifespan.
Remove Any Loose Debris
Start the cleaning process by removing any loose debris, such as leaves, branches, or peeling paint, from the fence surface. Clearing away debris ensures that the cleaning solution can penetrate effectively and prepares the surface for thorough cleaning and paint application.
Removing loose debris before cleaning the fence is crucial for achieving a successful result.
Not only does it allow the cleaning solution to work efficiently by reaching the surface without obstruction, but it also prevents trapped debris from causing streaks or uneven paint application. When dealing with different fence panels or layers, be sure to inspect each section carefully for debris accumulation. For wooden fences, pay attention to crevices and corners where debris can hide. Use a broom or brush to sweep away larger items before proceeding with the cleaning process. Taking the time to clear debris beforehand can significantly impact the final appearance and longevity of your freshly painted fence.
Apply The Cleaning Solution
Once the surface is clear of debris, apply the chosen cleaning solution using a sprayer or brush. Ensure even coverage of the solution on the fence surface, allowing it to penetrate and loosen dirt and grime effectively for easier removal during the scrubbing process.
When applying the cleaning solution, consistent coverage is crucial for optimal results. A sprayer can be efficient for larger surfaces, ensuring a uniform application of the solution. On the other hand, using a brush allows you to work the solution into crevices and intricate details of the fence.
Consider the type of cleaning product you are using – some may require dilution or mixing before application. Always follow the manufacturer’s instructions for the correct concentration to achieve the best cleaning outcomes. Factor in the weather conditions when applying the solution; choosing a dry, mild day can help the solution work effectively without evaporation or runoff issues.

Scrub The Fence
Use a scrub brush or sponge to scrub the fence surface thoroughly, focusing on areas with stubborn stains or dirt buildup. Work in sections to ensure that the entire fence is cleaned properly, paying extra attention to wooden surfaces that may require gentler scrubbing to avoid damage.
When scrubbing a fence, start by wetting the surface with water to loosen dirt and grime.
Apply a mixture of gentle soap and water to the brush or sponge to create a cleaning solution that is effective yet safe for the fence material.
Use circular motions and moderate pressure to scrub away any debris, being careful not to scratch or gouge the wood.
After scrubbing, rinse each section thoroughly with clean water to remove soap residue and prevent streaking.
Always work from the top down to prevent dirty water from dripping onto areas you have already cleaned, ensuring a more efficient and consistent cleaning process.

Rinse The Fence
After scrubbing, rinse the fence surface thoroughly using a garden hose or pressure washer to remove the cleaning solution and loosen dirt. Ensure that all residues are washed away, leaving a clean and residue-free surface ready for the next steps in the painting process.
Rinsing is a crucial step in the fence cleaning process as it helps to eliminate any remaining cleaning solution and dirt from the surface. Thorough rinsing ensures that the fence is free from any residues that could affect the paint adhesion. When rinsing, make sure to use water effectively by starting from the top and working your way down, allowing the water to flow naturally and carry away the contaminants.

Let The Fence Dry Completely
Allow the fence to dry completely before proceeding with the painting process. Depending on the weather conditions and the type of wood, drying times may vary. Ensure the fence is thoroughly dry to prevent any moisture-related issues during painting and to achieve the best paint adhesion.
Moisture content in wood can significantly impact the durability and finish of your paint job. Properly dried wood serves as a stable surface for paint, enhancing its lifespan and appearance.
To determine if the fence is ready for paint, touch the surface – if it feels cool or damp, it needs more time to dry. Also, check for any water beading or moisture discoloration on the wood.
Factors such as humidity levels, sunlight exposure, and wood density influence drying times. Consider using a moisture meter to ensure optimal conditions before applying paint.
What Are Some Tips For Cleaning Your Fence?
Cleaning your fence effectively requires attention to detail and following some key tips to ensure optimal results. From testing cleaning solutions to considering professional assistance, these tips can help you achieve a clean and well-prepared fence surface for painting.
One essential tip is to begin the cleaning process by assessing the type of material your fence is made of, as different materials require specific cleaning methods. In addition, wearing appropriate safety gear such as gloves, goggles, and a mask is crucial to protect yourself from any harsh chemicals or debris. Another useful practice is to use a gentle scrub brush or sponge to clean the fence instead of harsh abrasive materials that can damage the surface.
Test The Cleaning Solution First
Before applying the cleaning solution to the entire fence, test it on a small inconspicuous area to ensure compatibility and effectiveness. This test allows you to check for any adverse reactions and adjust the solution or method if needed for the best cleaning results.
This step is crucial as different types of fences respond differently to various cleaning solutions. For example, a bleach-based cleaner may work well on a vinyl fence but could damage a wooden fence. By conducting a test patch, you can prevent any potential damage to the entire fence.
To perform the test, mix a small amount of the cleaning solution according to the manufacturer’s instructions and apply it to a hidden spot on the fence. Let it sit for the recommended time, then rinse it off thoroughly. Look for any discolouration, warping, or other negative effects on the surface.
If the test patch shows satisfactory results, you can proceed with confidence to clean the entire fence. If there are any issues, you may need to try a different solution or adjust the concentration before tackling the entire surface.
Use Protective Gear
When cleaning a fence with strong cleaning solutions, wear protective gear such as gloves, goggles, and a mask to safeguard yourself from chemicals and debris. Proper gear ensures your safety during the cleaning process and reduces the risk of skin irritation or inhalation issues.
Protective gear plays a crucial role in shielding your body from potential harm, especially when dealing with harsh chemicals and abrasive cleaning agents. Wearing gloves shields your hands from direct contact with the cleansers, preventing skin irritation and chemical burns.
Goggles are essential for protecting your eyes from splashes of cleaning solutions that can cause severe eye irritation or damage. A mask helps prevent inhalation hazards, safeguarding your respiratory system from harmful fumes or dust particles released during the cleaning process.
Work In Sections
To clean the fence thoroughly and efficiently, work in manageable sections rather than tackle the entire length at once. This approach ensures systematic cleaning, allowing you to focus on specific areas and achieve consistent results across the entire fence surface.
When dividing the fence into smaller sections, you can allocate your time and energy more effectively. By focusing on one part at a time, you can pay attention to detail and ensure that no spots are missed. Working in sections helps prevent overwhelm and fatigue, making the cleaning process more manageable and enjoyable.
Be Gentle With Wooden Fences
When cleaning wooden fences, use a gentle touch to avoid damaging the wood surface or causing splintering. Opt for softer brushes or sponges and avoid harsh scrubbing motions that could mar the wood texture. Gentle cleaning ensures that the wooden fence remains intact and ready for painting.
It’s crucial to choose cleaning solutions that are specifically formulated for wood to prevent any chemical damage. Wood-friendly cleaners will help lift dirt and grime without deteriorating the material.
When rinsing the fence, use a low-pressure setting on your hose to prevent excessive water absorption. It’s also recommended to apply a protective sealant or stain after cleaning to enhance the wood’s longevity and appearance. By adopting these gentle cleaning methods, you can maintain the beauty and durability of your wooden fence for years to come.
Consider Hiring A Professional
If cleaning your fence seems daunting or you lack the time or expertise, consider hiring a professional for the job. Experienced professionals have the tools, skills, and knowledge to clean fences efficiently and effectively, ensuring a well-prepared surface for painting.
By enlisting the help of a professional fence cleaning service, you can save yourself time and effort while achieving high-quality results. These experts specialise in using the right techniques and cleaning agents to remove dirt, grime, and stains without causing damage to the fence material.
When selecting a reputable professional, ensure they offer a range of fence cleaning services tailored to your needs, such as pressure washing, chemical cleaning, and staining. Professional fence cleaners can also inspect for any repairs needed, potentially saving you from costly future maintenance.