Damp proof membrane is a crucial component in protecting your walls from dampness and mould growth.
We discuss what damp proof membrane is, why it is important to install it, and the materials needed for the installation process.
Find out how to properly install damp proof membrane on your walls with our step-by-step guide.
Learn about the benefits of installing damp proof membrane, including preventing dampness and mould growth, protecting the building structure, improving indoor air quality, and increasing property value.
Discover more about this essential home improvement project!
What Is Damp Proof Membrane?
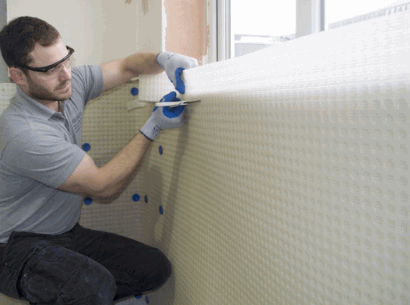
A damp proof membrane (DPM) is a protective layer made of plastic material that is used in construction to prevent dampness from penetrating floors or walls. It acts as a waterproof barrier, especially in concrete floors, to inhibit moisture rise and protect the building structure from potential damage.
The primary purpose of a damp proof membrane is to create a barrier against water-related issues in buildings. By preventing moisture ingress, the DPM safeguards against mould growth, rot, and other structural problems caused by damp conditions. Installation of the membrane typically involves laying it beneath the concrete slab or screed during construction. This ensures that any moisture from the ground is prevented from seeping up into the building. Damp proof membranes are crucial in maintaining the integrity of a structure and enhancing its longevity.
Check out: How To Damp Proof A Concrete Floor
Why Is It Important To Install Damp Proof Membrane?
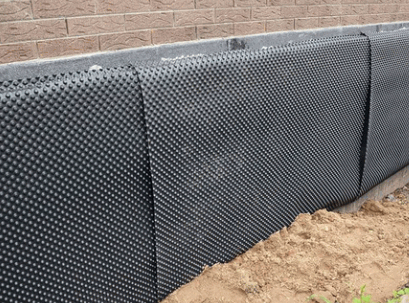
Installing a damp proof membrane is crucial for any property to protect it from damp problems, moisture penetration, and potential structural damage. It ensures that the building remains dry, free from mould, and maintains its integrity over time.
By having a proper damp proof membrane in place, property owners can significantly reduce the risk of mould growth and decay caused by excess moisture seeping into the structure. This membrane acts as a barrier against water ingress, preventing costly repairs and preserving the overall quality of the building. By addressing moisture-related issues proactively, the property’s longevity and market value are safeguarded, offering peace of mind to both residents and owners alike.
What Materials Are Needed To Install Damp Proof Membrane?
To install a damp proof membrane, various materials are required, including membrane sheets, tape, adhesive, measuring tape, and scissors. These tools and materials are essential for a successful damp proofing process.
Among these materials, the membrane sheets serve as the core component that provides a barrier against moisture infiltration. The tape is used to ensure a tight seal between the sheets, preventing water from seeping through the joints. Adhesive is crucial for securing the membrane in place and creating a lasting bond with the underlying surface. A measuring tape helps in accurately cutting and positioning the membrane, ensuring a precise fit. Lastly, scissors are critical for trimming the membrane sheets to the required dimensions, enabling a professional and neat finish.
Damp Proof Membrane Sheets
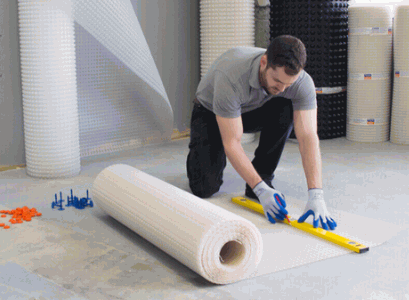
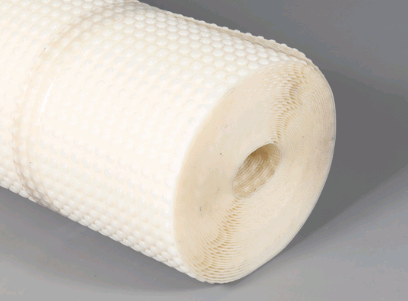
Damp proof membrane sheets are the primary components used to create a barrier against moisture. These sheets come in various thicknesses and are designed to be waterproof, ensuring effective protection against dampness.
Thicker damp proof membrane sheets provide enhanced durability and resistance to environmental pressures, making them ideal for heavy-duty applications. Conversely, thinner sheets offer flexibility and ease of handling during installation, catering to lighter projects.
When choosing the right sheet material, factors such as substrate condition, level of water exposure, and intended usage should be carefully considered. It is crucial to match membrane thickness with the specific requirements of the project to ensure optimal performance.
Tape
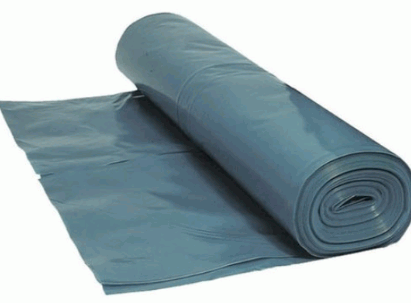
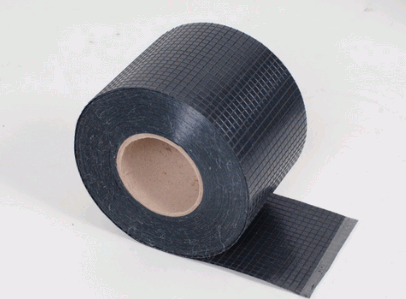
Tape is essential for sealing joints and overlapping edges of damp proof membrane sheets. Waterproof adhesive tape is commonly used to ensure a secure and watertight connection between membrane sections.
Properly sealing these junctions is crucial to prevent moisture seepage and maintain the integrity of the membrane. The choice of tape can vary depending on the application, such as butyl rubber tape for its flexibility or foil-backed tape for added durability.
During installation, it is important to carefully apply the tape along the seams, ensuring a tight seal that effectively blocks any potential water infiltration. Without this attention to detail, the effectiveness of the damp proof membrane could be compromised.
Adhesive
Adhesive is necessary for securing damp proof membrane sheets in place, especially on concrete floors. It provides a strong bond between the membrane and the surface, ensuring long-lasting protection against dampness.
When installing a damp proof membrane, using the right adhesive is crucial to guarantee its effectiveness over time. Adhesive not only fixes the membrane securely to the concrete floor but also creates a barrier that prevents moisture from seeping through. This bond ensures that the membrane remains intact, serving its purpose of keeping the underlying structure dry and free from damp-related issues. Plus adhesive, membrane fixing plugs are often utilised to further reinforce the attachment of the membrane to the surface.
Utility Knife
A utility knife is a handy tool for cutting damp proof membrane sheets to the required size during installation. It allows for precise cuts and is commonly used by professionals for efficient membrane installation.
When working with damp proof membrane, accuracy is key to ensuring a proper fit and effective moisture protection. The utility knife’s sharp blade makes it ideal for cleanly cutting through various types of membranes without causing jagged edges. Professionals often rely on the utility knife to swiftly tackle membrane installation tasks, saving time and effort in the process.

Measuring Tape
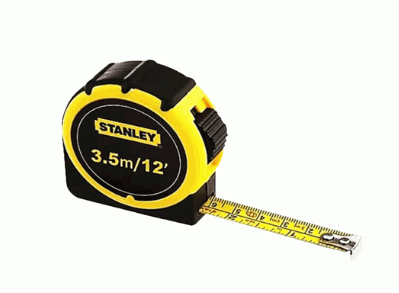
A measuring tape is essential for ensuring accurate dimensions and proper alignment of damp proof membrane sheets during installation. It plays a crucial role in achieving precise and effective membrane works.
By using a measuring tape, installers can carefully assess the required dimensions, ensuring that each membrane sheet fits perfectly in place. This tool facilitates the process of cutting membrane sheets to the correct size, minimising wastage and ensuring a seamless installation. With the accurate measurements obtained through the use of a measuring tape, the risk of errors and misalignments is significantly reduced, ultimately leading to a durable and effective damp proofing solution.
Scissors
Scissors are a convenient tool for cutting damp proof membrane sheets and trimming edges during installation. They are essential for achieving clean and precise cuts, especially when dealing with overlapping edges.
When using scissors for membrane installation, it is crucial to ensure they are sharp to avoid tearing or jagged edges. Before cutting, mark the sheet accurately using a pencil or marker to guide the cutting process. Make sure to maintain a steady hand and apply even pressure while cutting to maintain a straight line. Utilising a metal ruler or straight edge can also aid in achieving accurate cuts.

Step-By-Step Guide To Installing Damp Proof Membrane
- First and foremost, prepare the surface by clearing away any debris or obstructions. It’s crucial to have a smooth and clean surface to work on.
- Next, measure the area accurately to determine the amount of membrane needed. Make sure to add some extra material for overlaps and cutting.
- Before laying down the membrane, check for any signs of moisture or leaks that need addressing.
- When you start laying the membrane, ensure it is flat and even without any wrinkles or creases. Proper adhesion is key, so use appropriate adhesives according to the membrane type.
- Trim any excess material and secure edges properly to prevent any water infiltration. Quality assurance checks should be conducted throughout the installation process to guarantee a reliable and durable damp proofing solution.
Step 1: Prepare The Wall Surface
The first step in installing a damp proof membrane is to prepare the wall surface by addressing any existing damp problems. It is essential to ensure a clean and dry surface for effective membrane installation.
One crucial aspect of preparing the wall surface is to thoroughly inspect it for signs of dampness, such as water stains, peeling paint, or musty odours. This identification allows for targeted remediation before laying down the damp proof membrane.
Any cracks or holes in the wall should be filled and repaired to create a smooth and uniform base for the membrane. This step is vital in ensuring that the membrane adheres properly and functions optimally in keeping moisture at bay.
Cleaning the surface with a suitable cleaner and allowing it to dry completely helps in achieving maximum adhesion and effectiveness of the damp proof membrane. Taking these preparatory measures sets the foundation for a successful dampness mitigation system and helps prevent potential moisture-related issues in the future.
Step 2: Measure And Cut The Damp Proof Membrane Sheets
For precise installation, measure and cut the damp proof membrane sheets to fit the dimensions of the area. Ensure accuracy in sizing and consider the required thickness for optimal protection.
Accurate measurement and cutting of damp proof membrane sheets play a crucial role in ensuring the effectiveness of the waterproofing solution. Proper sizing helps in achieving a seamless fit that prevents moisture penetration and potential damage to the structure. When measuring, it is essential to take precise dimensions of the area to avoid gaps or overlaps that could compromise the barrier’s integrity.
Choosing the right thickness of the membrane sheet is equally important. Thicker sheets offer enhanced durability and resistance to punctures, while thinner ones are more flexible and easier to work with. Consider the specific needs of the location, such as traffic levels or substrate conditions, when selecting the appropriate thickness for the application.
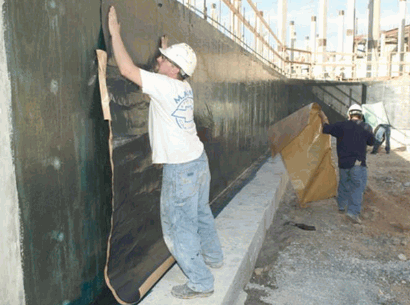
Step 3: Apply Adhesive And Secure The Sheets
Apply adhesive to the surface and secure the damp proof membrane sheets in place, ensuring a strong bond with the underlying structure. Use membrane-fixing plugs for additional reinforcement, especially on concrete floors.
Before applying the adhesive, make sure the surface is clean, dry, and free of any debris that could interfere with the bonding process. Choose an adhesive that is suitable for both the membrane material and the substrate it will be applied. Spread the adhesive evenly across the surface using a trowel or a recommended application tool, ensuring full coverage. When placing the membrane sheets, press them firmly into the adhesive to remove any air pockets and achieve a secure attachment.
Step 4: Seal The Joints And Edges With Tape
Seal the joints and edges of the damp proof membrane sheets using waterproof adhesive tape to create a watertight barrier. Ensure proper overlap and secure the connections for effective protection.
Proper sealing of the damp proof membrane is crucial to prevent moisture ingress, which can lead to damage and mould growth. By carefully applying waterproof adhesive tape along the seams and edges, you create a seamless shield that safeguards your structure. Remember to overlap the sheets slightly to strengthen the barrier and maximise water resistance. Pay close attention to the tape application, ensuring it adheres firmly to the surface for a durable seal. This meticulous approach guarantees long-lasting waterproofing performance and peace of mind.
Step 5: Allow The Adhesive To Dry
After securing the membrane sheets, allow the adhesive to dry completely before proceeding with any additional steps. Professional installation ensures proper drying and adherence of the membrane to the surface.
Proper drying of the adhesive in damp proof membrane installation is crucial to the success of the project. To ensure optimal adhesion and longevity, it is recommended to follow manufacturer guidelines on drying times and conditions. Using a moisture meter can help monitor the moisture content and determine when the adhesive is fully dry.
Quality control measures, such as inspecting the drying progress at regular intervals and maintaining consistent temperature and humidity levels, can contribute to a successful installation. Professional techniques, like applying the adhesive with the correct trowel notch size and pressure, will also aid in achieving a strong bond between the membrane and the substrate.
What Are The Benefits Of Installing A Damp Proof Membrane?
Installing a damp proof membrane offers numerous benefits, including preventing damp and mould growth, protecting the building structure, improving indoor air quality, and increasing property value.
By acting as a barrier against moisture ingress, a damp proof membrane safeguards the property from potential water damage, which can compromise the integrity of the building over time. This protective layer not only prevents costly structural repairs but also ensures a healthier indoor environment by reducing the risk of mould formation and related health issues.
The installation of a damp proof membrane can significantly enhance the property’s longevity and value, providing peace of mind to homeowners and prospective buyers alike. With improved property maintenance and reduced maintenance costs, investing in damp proofing solutions proves to be a wise decision in the long term.
Prevents Dampness And Mould Growth
One key benefit of a damp proof membrane is its ability to prevent dampness and inhibit mould growth by creating a moisture-resistant barrier. Proper installation ensures long-term protection against moisture-related issues.
Having a damp proof membrane in place is crucial for maintaining a dry and healthy environment within your living space. By forming a protective shield against moisture infiltration, this membrane acts as a frontline defence mechanism to safeguard your walls and floors from water damage.
The correct installation of the damp proof membrane is imperative to ensure its effectiveness. Improper installation can lead to gaps or tears, compromising its ability to block moisture effectively. Regular maintenance checks are essential to detect any signs of wear and tear and address them promptly to uphold the integrity of the membrane.
Not only does a well-installed damp proof membrane prevent the growth of mould and mildew by keeping moisture at bay, but it also plays a significant role in enhancing indoor air quality. By reducing the humidity levels in the air, it helps create a healthier living environment free from mould spores and airborne contaminants.
Protects Building Structure
Another benefit of installing a damp proof membrane is that it protects the building structure from potential damage caused by water penetration. The waterproof layer acts as a shield, ensuring the longevity and durability of the property.
By creating a barrier that prevents moisture from seeping into the walls and foundation, the damp proof membrane plays a crucial role in maintaining the structural integrity of the building. Without this protective layer, water can lead to issues such as dampness, mould growth, and even structural weakness, compromising the safety and stability of the entire building. The durability of the membrane ensures long-term effectiveness in safeguarding against water intrusion, offering peace of mind to property owners against potential water-related problems. Incorporating such protective measures during construction or renovation projects is essential for enhancing the building’s resilience and longevity.
Improves Indoor Air Quality
Installing a damp proof membrane contributes to improved indoor air quality by reducing moisture rise and preventing damp-related issues. Proper ventilation and moisture control are essential for creating a healthy living environment.
By creating a barrier that inhibits moisture infiltration, a damp proof membrane effectively minimises the risk of mould and mildew growth in indoor spaces. This, in turn, helps to prevent respiratory issues and allergies that can be exacerbated by poor air quality. The optimisation of ventilation systems alongside the installation of a damp proof membrane ensures that fresh air circulates efficiently, reducing the concentration of indoor pollutants and promoting overall well-being.
Increases Property Value
The installation of a damp proof membrane can increase the property value by ensuring a well-maintained and moisture-free building. Buyers are often attracted to properties with effective damp proofing systems in place.
When potential buyers see a property that has been safeguarded against dampness, it gives them peace of mind knowing that the structure is protected against potential moisture-related issues.
A property with a high-quality damp proof membrane not only enhances the aesthetics by preventing unsightly damp patches or mould growth but also contributes to the overall durability of the building.
This added layer of protection against moisture infiltration can significantly improve the market desirability of the property, ultimately leading to a higher valuation and potential return on investment.