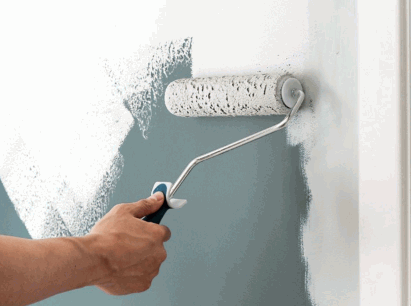
Are you looking to revamp your walls by removing old plaster? If so, you’ve come to the right place!
In this guide, we will walk you through the tools and materials needed for this project, as well as how to prepare the room and wall for plaster removal. We will also provide you with a step-by-step guide on how to effectively remove the plaster, deal with any damaged areas, and finish off with some smooth touches.
Stay tuned to learn all you need to know about removing plaster from a wall!
Tools And Materials Needed
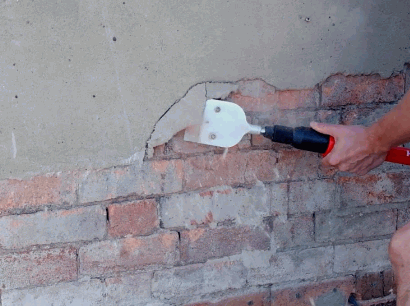
When removing plaster from walls, having the right tools and materials is crucial to ensure a smooth and efficient process. Essential tools include chisels, scrapers, hammers, and an SDS drill for tougher sections.
Chisels are typically used for precise and controlled removal of plaster, especially in tight corners and edges where other tools may not reach easily. Scrapers, on the other hand, are perfect for scraping off loose or small patches of plaster with ease.
Hammers come in handy for breaking down thicker layers of plaster or stubborn spots that need more force. The SDS drill, with its powerful motor and specialised bits, can tackle hardened or reinforced plaster sections effectively.
Uncover more: What Is Lime Plastering
What Tools Are Needed For Removing Plaster From A Wall?
Tools required for removing plaster from a wall include chisels for cutting through the plaster, hammers for breaking it into smaller sections, and scrapers to peel off the layers. An SDS drill is useful for drilling holes in tougher plaster areas.
Chisels are essential for precise cutting along the edges of the plaster, allowing you to create clean lines for removal.
Hammers, on the other hand, provide the necessary force to break the plaster into manageable pieces, making the overall process more efficient.
Scrapers come in handy for gently removing the layers of plaster without damaging the underlying surface.
When using an SDS drill, ensure you have the correct drill bit for the job to prevent unnecessary strain on the machine or potential accidents.
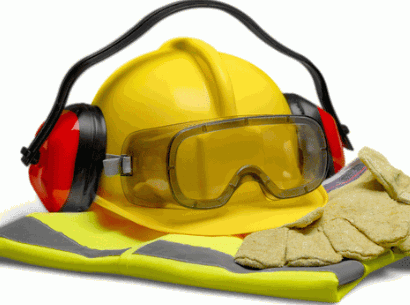
It is crucial to wear appropriate safety gear, including goggles and gloves while using these tools to protect yourself from flying debris and sharp edges.
What Materials Are Needed For Removing Plaster From A Wall?
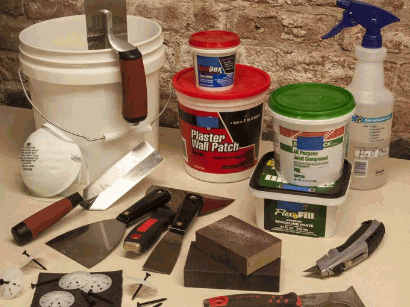
Along with tools, materials such as protective equipment like safety glasses and gloves are essential for personal safety during plaster removal. Dust sheets, buckets for debris, and heavy-duty bin bags are crucial for effective cleanup.
When removing plaster, it is vital to prioritise safety and cleanliness. Proper protective gear shields your eyes and hands from potential hazards like debris and dust.
- Wearing safety glasses prevents particles from flying into your eyes.
- Using gloves safeguards your hands from sharp edges and chemical residues.
Preparing the work area with dust sheets can minimise the spread of plaster particles throughout the room. Placing buckets strategically near the removal site simplifies the collection of debris, making cleanup more efficient.
Preparing The Room And Wall For Plaster Removal
Before starting the plaster removal process, it is vital to prepare the room and wall adequately to minimise damage and hazards. Protecting floors with heavy-duty plastic and identifying potential asbestos in older plaster walls are crucial steps.
One of the main considerations is to seal off the room entirely to prevent the spread of dust and debris. Use plastic sheeting to cover furniture and other belongings, ensuring that they are fully protected from any potential damage. Wearing protective gear such as masks and gloves is essential to safeguard against inhaling harmful particles during the removal process.
If there is a suspicion of asbestos in the old plaster walls, it’s imperative to contact a professional asbestos removal service to safely handle the situation. Asbestos exposure can have serious health implications, so proper identification and handling are non-negotiable when dealing with older building materials.
How To Protect Furniture And Floors?
To protect furniture and floors during plaster removal, consider using heavy-duty plastic sheets or hardboard taped to the flooring. Cleats on shoes can prevent debris transfer to other areas of the house.
Another effective method is to place dust sheets or large tarps over furniture to shield them from dust and potential damage. Utilising a combination of protective materials, such as masking tape and rosin paper, can help secure coverings in place and minimise the risk of accidents during renovation work. Implementing a strict dust control regime, including sealing off the work area with plastic barriers and using a HEPA-filtered vacuum regularly, can significantly reduce the spread of particles and keep your property cleaner throughout the renovation process.
How To Prepare The Wall For Plaster Removal?
Preparing the wall for plaster removal involves identifying and removing lath nails, checking for hidden bricks behind plaster, and understanding the diagonal route of the lath on walls.
Once the lath nails have been located and removed, the next crucial step is to carefully inspect the wall for any concealed bricks that could impede the plaster removal process. These hidden obstacles may require additional care and tools to safely extract them without causing damage to the surrounding area.
It’s important to note that the diagonal layout of the lath plays a significant role in determining the direction in which the plaster can be removed. This unique pattern influences the approach one must take to ensure efficient and thorough removal without causing unnecessary harm to the underlying structure.
Step-By-Step Guide For Removing Plaster From A Wall
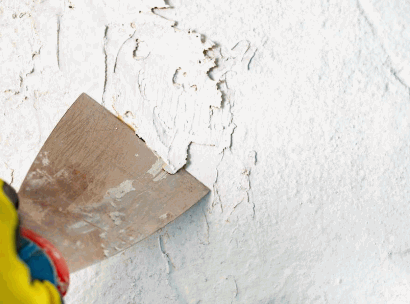
Removing plaster from a wall requires a methodical approach to ensure efficient and safe removal. Cutting the plaster into manageable sections, following the plaster and lath direction, and using a chisel to separate layers are key steps.
Start by preparing the area by covering floors and furniture with dustsheets to catch falling debris. Next, use a utility knife to score the plaster surface into smaller sections.
- Work systematically across the wall, ensuring each section is manageable for removal.
- When dealing with plaster and lath configurations, take extra care to separate the two layers without damaging the underlying structure.
Utilise a sturdy chisel to gently tap and prise the plaster away from the wall, focusing on the scored lines for easier detachment. Remember to wear appropriate safety gear such as goggles and gloves to protect yourself from flying debris during the removal process.
Step 1: Scoring The Plaster
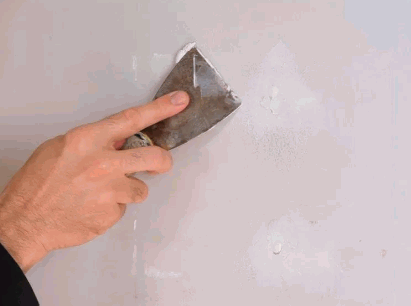
The initial step in removing plaster is scoring the surface using a scraper to create lines for easier removal. Scoring helps prevent large plaster chunks from tearing off and damaging the wall underneath.
When scoring, it is essential to maintain a controlled approach to avoid causing unnecessary harm. By methodically creating shallow cuts in a grid pattern, you can weaken the bond between the plaster and the wall. This technique facilitates the subsequent removal process while minimising structural damage.
Step 2: Removing The Plaster
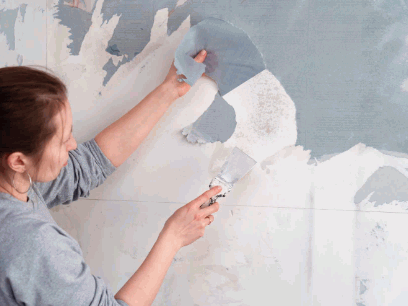
- Once the plaster is scored, begin removing it by scraping parallel to the wall surface to prevent unnecessary damage. Be cautious when removing lath boards that may be hidden behind plaster, following the diagonal route of the lath.
Scraping parallel to the wall involves using a putty knife or scraper to gently detach the plaster without causing harm to the underlying surface. This technique helps maintain the integrity of the wall structure throughout the removal process.
In some cases, lath boards may be encountered beneath the plaster layers. Identifying these wooden strips is crucial to avoid damaging them during removal. To safely remove lath boards, carefully pry them away from the wall at an angle, ensuring a smooth extraction without causing unnecessary disruptions to the surrounding area.
Step 3: Cleaning The Wall Surface
After the plaster removal, it is essential to clean the wall surface thoroughly to remove any remaining debris and dust. Use dust sheets to protect cables and outlets during the clean-up process.
Begin by sweeping the walls with a soft-bristled brush or vacuum to eliminate loose particles. Next, dampen a clean cloth with water or a mild cleaning solution to wipe down the walls gently, ensuring no residue is left behind.
To tackle stubborn stains, mix a solution of water and vinegar or use a specialised cleaner according to the wall material. Scrub gently to avoid damaging the surface.
Once the walls are clean and dry, inspect the area for any missed debris or dust. Ensure all electrical outlets are covered with tape or plastic to prevent water damage during the cleaning process.
Dealing With Damaged Areas
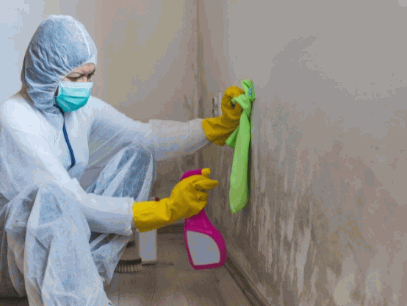
Addressing damaged areas post-plaster removal involves repairing small holes with filler and tackling larger damaged sections by replacing plaster or using patching compounds.
When dealing with small holes, a quick and effective solution is to use a lightweight filler compound. Simply fill the hole, let it dry, and sand it smooth. For larger damaged sections, consider replacing the damaged plaster entirely for a seamless finish. If the damage is extensive, consider using a patching compound for a sturdy and lasting repair. Assess the severity of the damage first to determine the most suitable repair method.
How To Repair Small Holes And Cracks In The Wall?
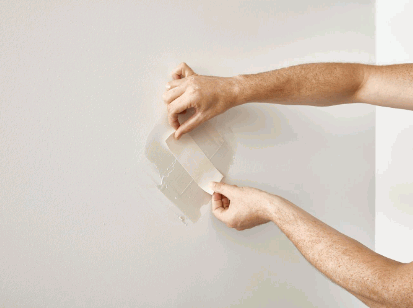
For small holes and cracks, use sheeting to cover the damaged area and reinforce it with metal patches. Remove loose debris by hand before scraping the edges for a smooth repair.
- Start by cutting a piece of sheeting large enough to cover the hole or crack, ensuring it extends beyond the damaged area.
- Place the sheeting over the hole and press it firmly against the wall.
- Next, adhere to metal patches on top of the sheeting for added strength and support.
- Use a putty knife to scrape off any excess material around the edges, creating a flush surface.
- Allow the repair to dry completely before sanding and painting to seamlessly blend it with the rest of the wall.
How To Repair Large Areas Of Damage On The Wall?
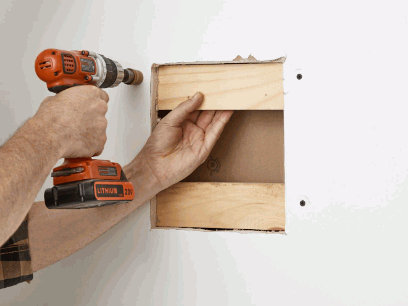
Large areas of damage on walls may require broader patches or patching compounds for effective repair. In cases of severe damage, consider replacing sections of lath or applying new plaster to damaged walls.
When dealing with significant damage after plaster removal, it’s essential to address the issue strategically to ensure a smooth and durable finish.
Broader patches are a practical solution for covering extensive areas of damage, providing a stable foundation for the repair process. Additionally, patching compounds can be useful for filling in deep voids or gaps in the surface, creating a seamless look.
If the damage is extensive, replacing sections of the lath may be necessary to reinforce the wall structure before applying new plaster. This step is crucial in cases where the existing lath is compromised or damaged beyond repair. Applying new plaster afterward helps restore the wall’s integrity and appearance, ensuring a professional outcome.
Finishing Touches
Achieving a smooth and flawless wall surface post-plaster removal involves priming the surface to seal it and applying quality paint for a fresh look. Smoothing out any imperfections ensures a professional finish.
Once the wall has been thoroughly cleaned of any remaining plaster residue, it’s time to address the final steps to transform it into a sleek canvas for your space. Before diving into painting, the wall needs to be primed properly to create a strong bond with the paint and ensure a consistent finish.
Priming not only helps the paint adhere better to the surface but also prevents any patches or discolouration from showing through. Choosing a high-quality primer suited for the specific wall material can make a significant difference in the final outcome.
After priming, selecting the right paint colour and type is crucial. Opting for a paint with a smooth finish will further enhance the overall aesthetic. Remember to use even strokes and apply the paint evenly to achieve a seamless look.
How To Smooth Out The Wall Surface?
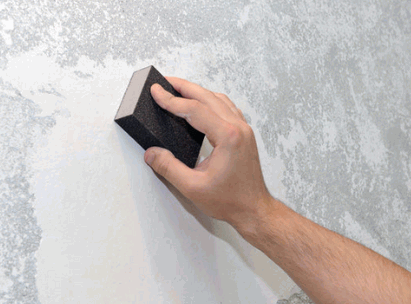
Smoothing out the wall surface involves assessing the need for replacing the plasterboard or applying a new layer of plaster to achieve a seamless finish. Address any protruding lath nails or screws for a professional look.
One option to smooth out the wall post-plaster removal is to consider replacing the existing plasterboard with fresh board panels. This ensures a clean base for a new finish without the imperfections that may have developed over time.
Another approach is to apply a fresh layer of plaster carefully onto the existing surface, filling in any gaps or uneven areas for a uniform appearance.
It is crucial to carefully inspect the wall for any protruding lath nails or screws that can disrupt the smooth finish. These should be either removed or countersunk to ensure they are flush with the wall surface.
How To Prime And Paint The Wall?
Before painting the wall, prime the surface to enhance paint adhesion and durability. Use quality paint and apply multiple coats for a long-lasting finish. Protect flooring and use scrapers for clean edges during painting.
Priming the surface before painting is crucial as it provides a smooth, uniform base for the paint to adhere to. A good primer seals the surface, helps hide imperfections, and ensures better coverage of the topcoat. When applying the primer, make sure to let it fully dry before proceeding with the paint layers.
In terms of selecting paint, opt for high-quality options with good coverage and durability. Cheap paints may save money initially but can end up costing more in the long run due to frequent repainting. Applying multiple coats of paint not only enhances the colour depth but also adds an extra layer of protection.
Protecting the flooring is essential to prevent accidental spills and drips from ruining the surface. Use dust sheets or plastic sheets to cover the floor and secure them in place to avoid tripping hazards. Using painter’s tape along skirting boards and trims can help achieve clean, crisp edges without smudges or drips.
